.png)
The purpose of this feature is to manage the containers and their related settings through the following functionalities:
1. View Container
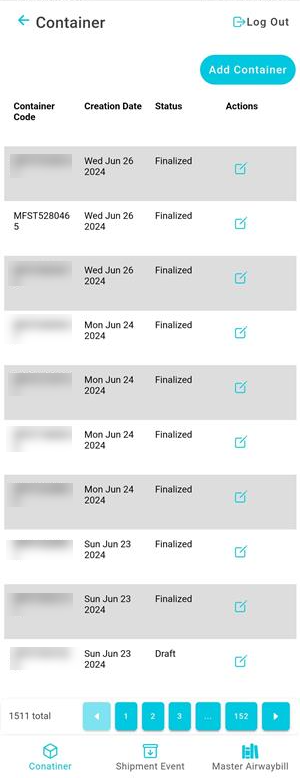
The user can view the defined container (also known as the Manifest) in the system through the ‘Container’ tap as follows:
-
Add Container: the user can add a new container by referring to the Add New Container section.
-
Total: the user can select the number of items to show on each page.
-
Actions: by clicking on this button the user can edit the container by referring to the edit Container section.
1.1 Edit Container
The user can edit an existing container by clicking on Edit from Actions through the ‘Container’ tap as follows:
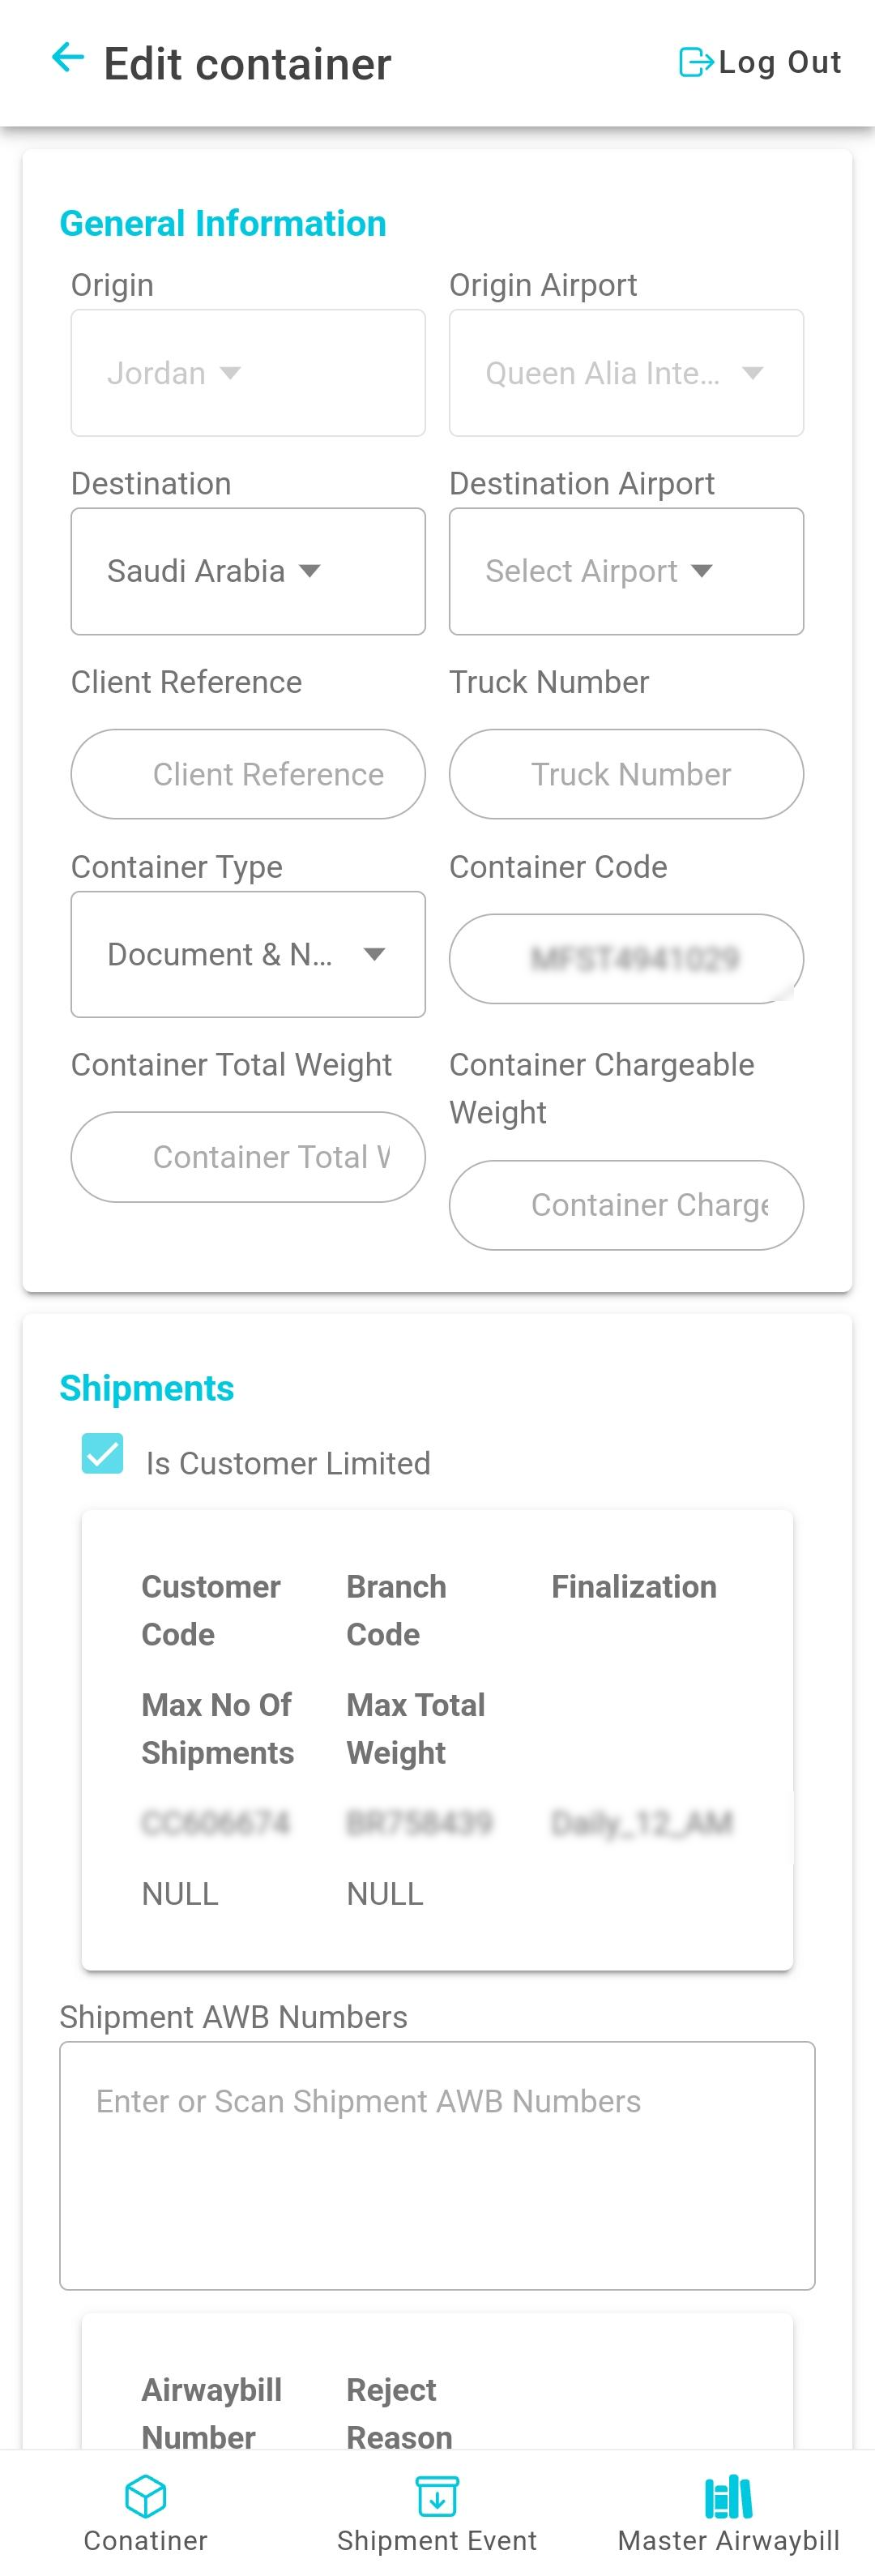
By clicking on Submit, the system saves any edit successfully as a draft.
2. Add New Container
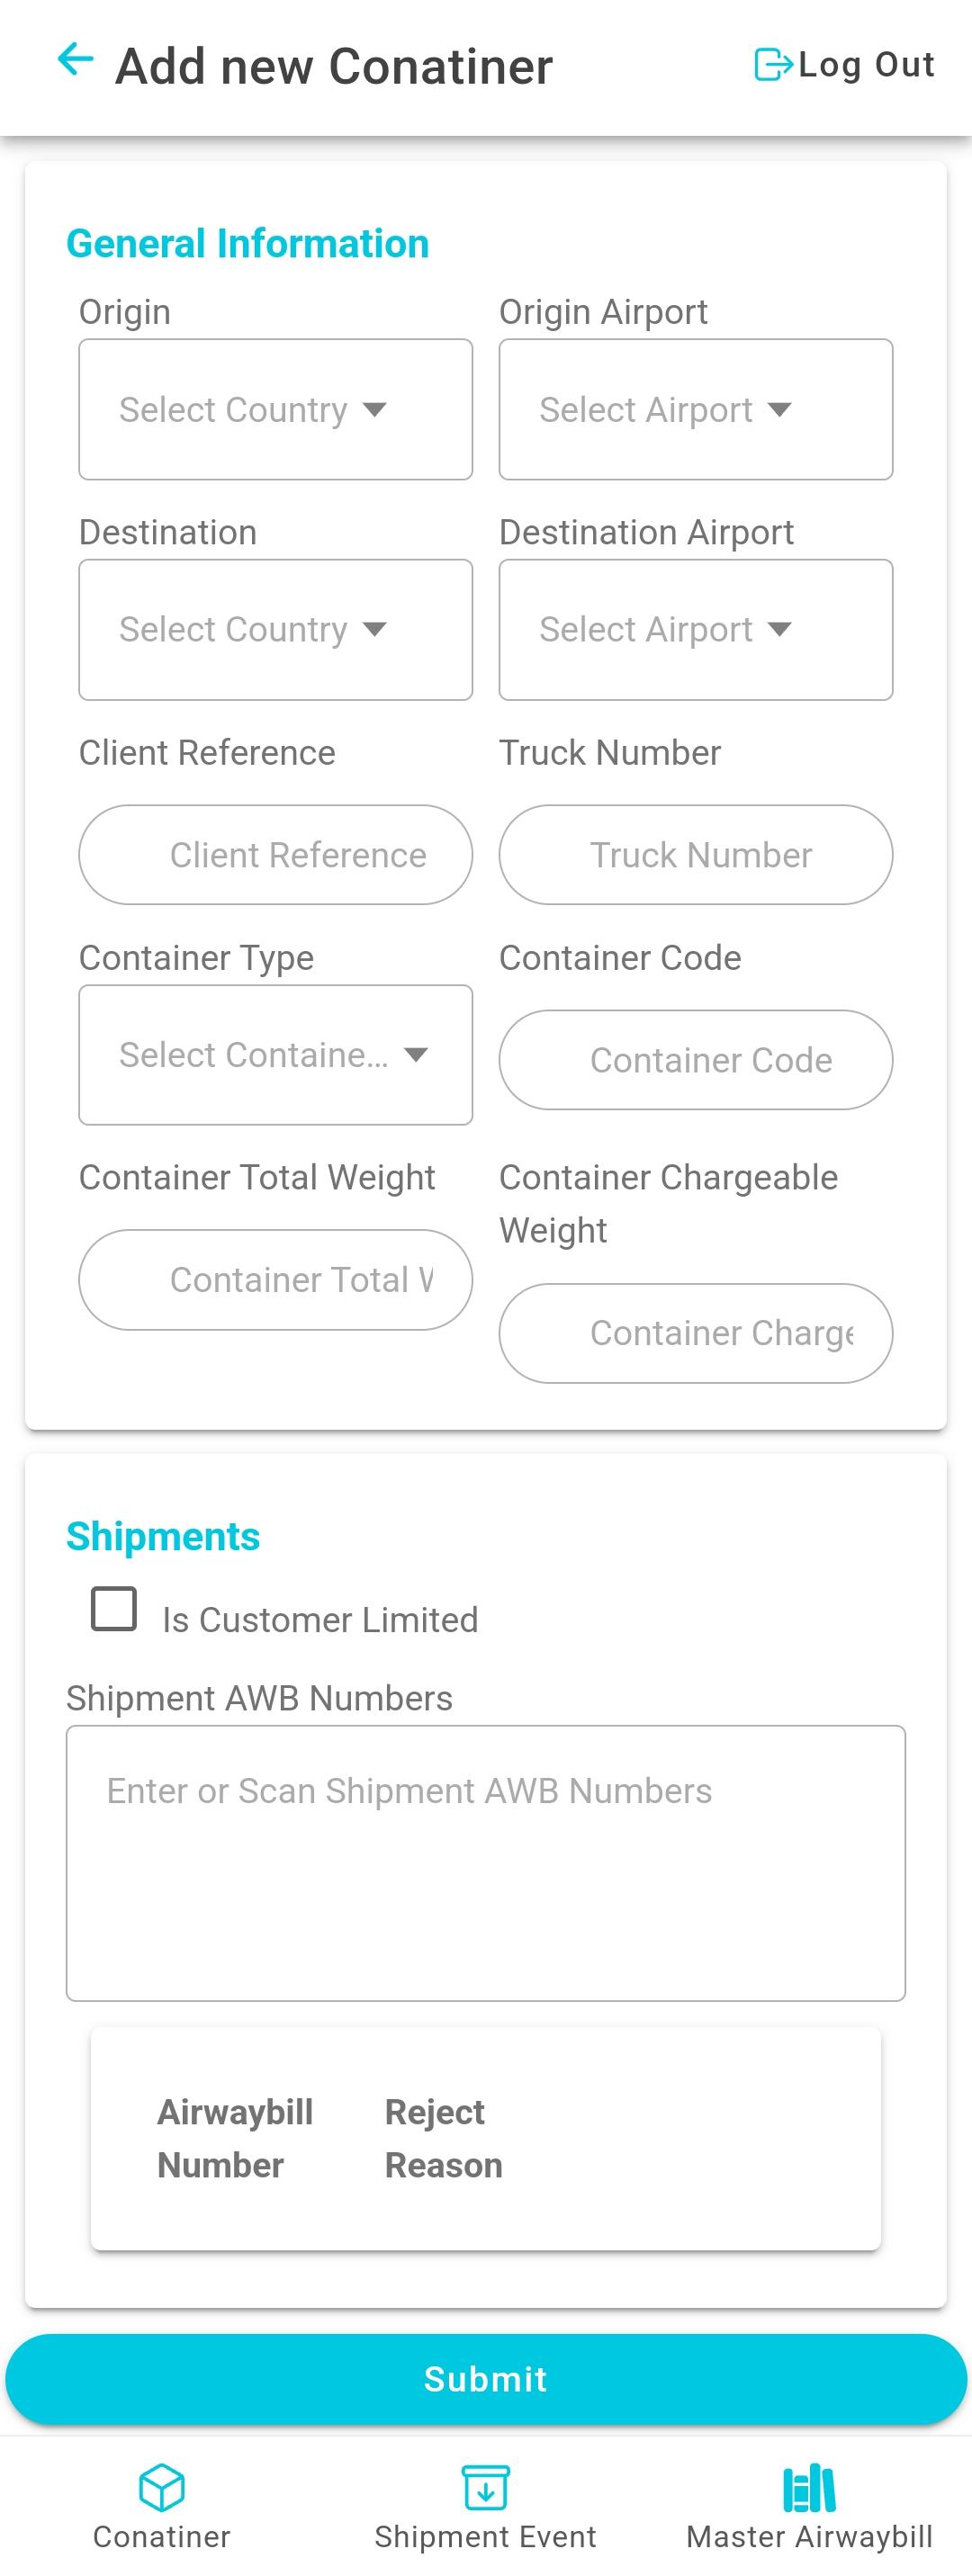
The user can add a new container by navigating to the ‘Container’ screen tap and clicking on Add Container as follows:
-
Origin: this field represents the container’s origin country.
-
Origin Airport: this field represents the container's origin airport.
-
Destination: this field represents the container’s arrival country.
-
Destination Airport: this field represents the container's destination airport.
-
Client Reference: this field represents the container’s unique number or text added and used by the shipper.
-
Truck Number: this field represents the truck number transporting the container in case of land freight.
-
Container Type: this field represents the container’s type, e.g.: Document, Non-Document, Normal, etc.
-
Container Code: this field represents the container’s external code used for integration purposes.
-
Container Total Weight: this field represents the total weight of all shipments within a container.
-
Container Chargeable Weight: this field represents the weight measurement that is used by the customer to determine the value of the goods
-
Shipment
The user can view the shipments added to the container through the Shipments section.
-
Is Customer Limited: when this is enabled, it provides the option to restrict the container to either a single customer or multiple customers. This requires shipments to undergo a validation process to ensure they are associated with one of the linked customers. If not enabled, no validation will be conducted when adding shipments to the containers.
-
Shipment AWB Numbers: this input field permits the user to input all the AWB numbers to be included in the container, with built-in validation to check that the shipment has not already been added to another container.
By clicking on Save As Draft, the system adds a new container as a draft successfully