.png)
Users Accounts Module

Document History
Version | Author | Reviewer/Approver | Date of Issue | Page / Section | Brief Description |
|---|---|---|---|---|---|
1.0 | Deema Z. | Asma L. | 23 Apr 2024 | Accounts | Approved |
Glossary
Term | Description |
|---|---|
Accounts | Users Management Module |
Operational User | User type that can use GN TEQ system through a web portal |
API User | User type that can use GN TEQ system through APIs |
1. User Management
1.1 View Users
The admin can view the defined users in the system by navigating to the ‘Users’ screen by choosing the Accounts Module from the left navigation panel as follows:
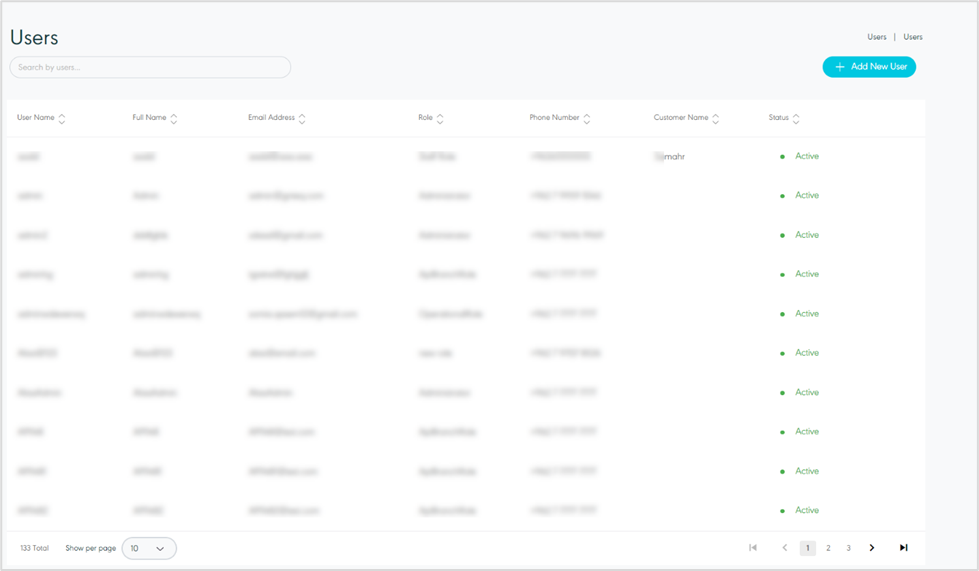
Figure 1- View Users
Search: the admin can search for the user by typing in the search filter field.
Show per page: the admin can select the number of items to show on each page.
Add New User: the admin can add a new user by referring to the Add New Users section.
Actions: by clicking on this button the admin can view specific user details by referring to Vier User Details, edit the user by referring to Edit User, or delete user by referring to the Delete User as follows:
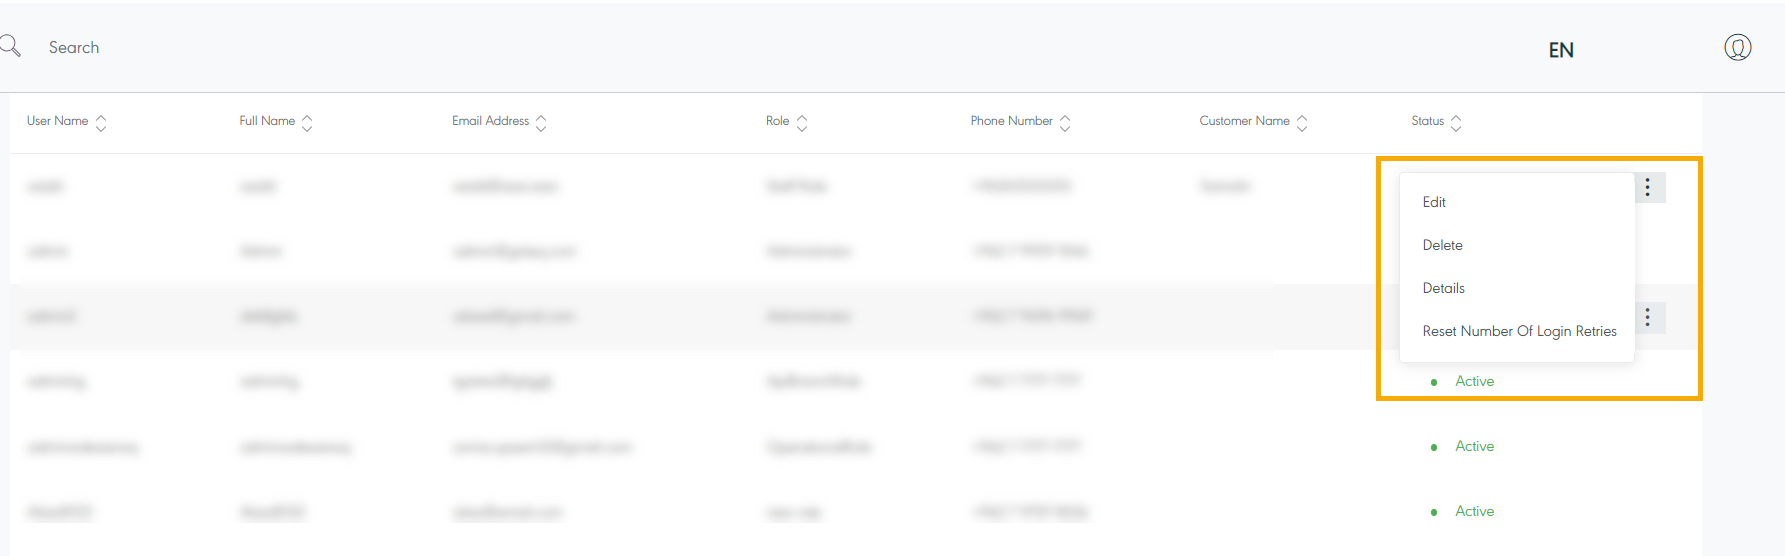
Figure 2- User Related Actions
1.2 View Users Details
The admin can view the user details by navigating to the ‘Users’ screen via the Accounts Module and clicking on Details from Actions as follows:
Administration Permeations
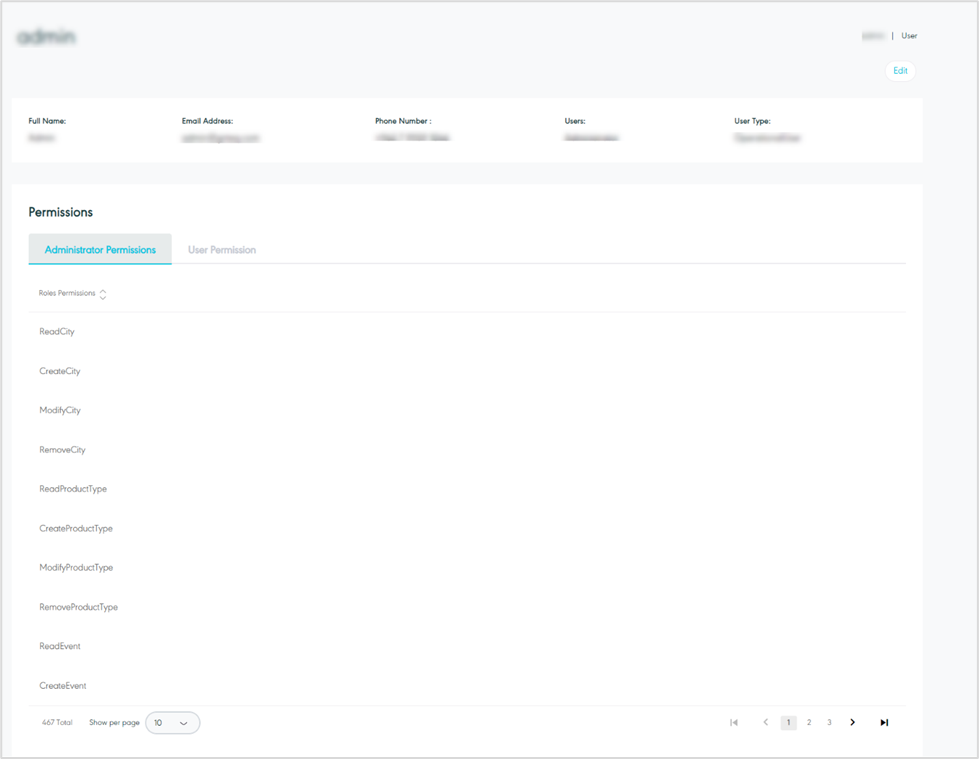
Figure 3- Administration Permission Related User Details
Edit: the admin can edit the user information by referring to the Edit User section.
Show per page: the admin can select the number of items to show on each page.
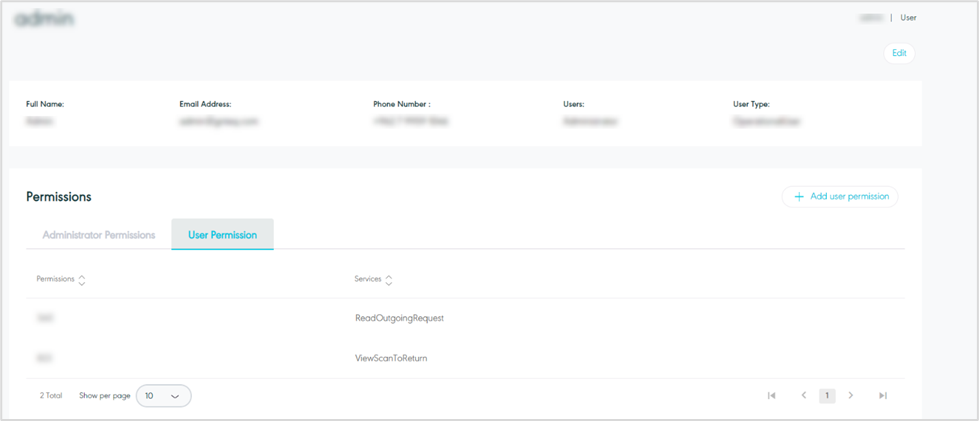
Figure 4- User Permissions
User Permissions
Add New Permission: the admin can assign permission to the user where this permission is not addressed in the related user role group by clicking on the Add New Permission button.
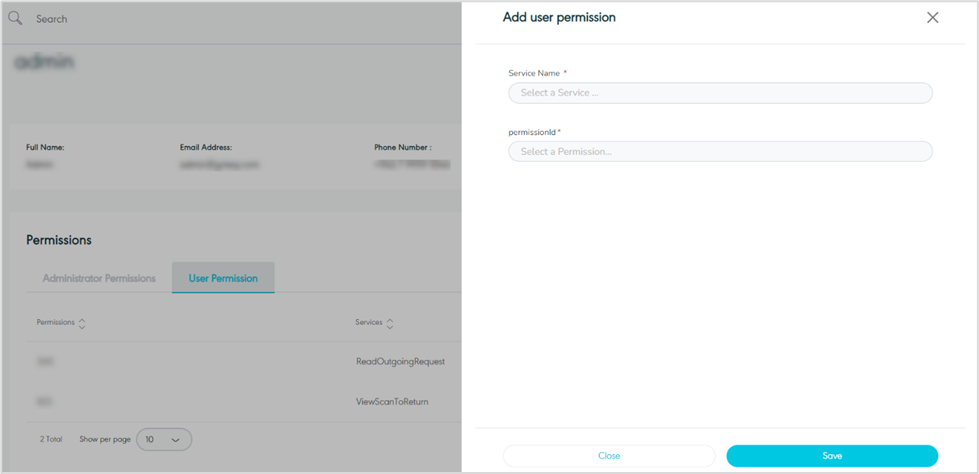
Figure 5- Add New Permission
Service Name: This field represents the name of the module available in the system, to be selected for assignment to the user.
Permission Id: this field represents the section in the module.
By clicking on Save, the system updates and successfully adds new permission to the user.
1.3 Add New User
The admin can add a new user by navigating to the ‘Users’ screen via the Accounts Module and clicking on Add New User as follows:
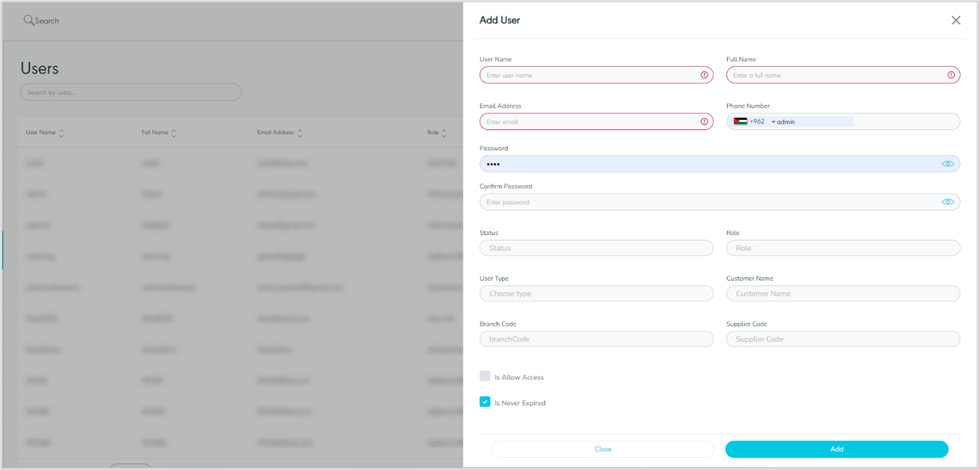
Figure 6- Add New User
Username: this field represents the user’s short name.
Full Name: this field represents the user’s full name.
Email Address: this field represents the user’s Email address.
Phone Number: this field represents the user’s phone number.
Password: this field represents the user’s password.
Confirm Password: this field represents the user’s confirmed password.
Status: this field represents the status where active means that the user is currently functioning with GN TEQ and inactive means that the user is no longer with GN TEQ.
Role: this field represents the user’s role.
User type: this field represents the user’s user type.
Customer Code: this field represents the customer’s code number to which the user will be added.
Branch Code: this field represents the branch’s code number to which the user will be added.
Is Allow Access: if it is checked, then the user can access the system, it's not for API users.
Is Never Expired: if checked then the API user can generate a token, when needed, to access the system.
By clicking on Save, the system adds a new user successfully.
1.4 Edit User
The admin can edit the user information by clicking on Edit from Actions by navigating to the ‘Users’ screen via the Accounts Module as follows:
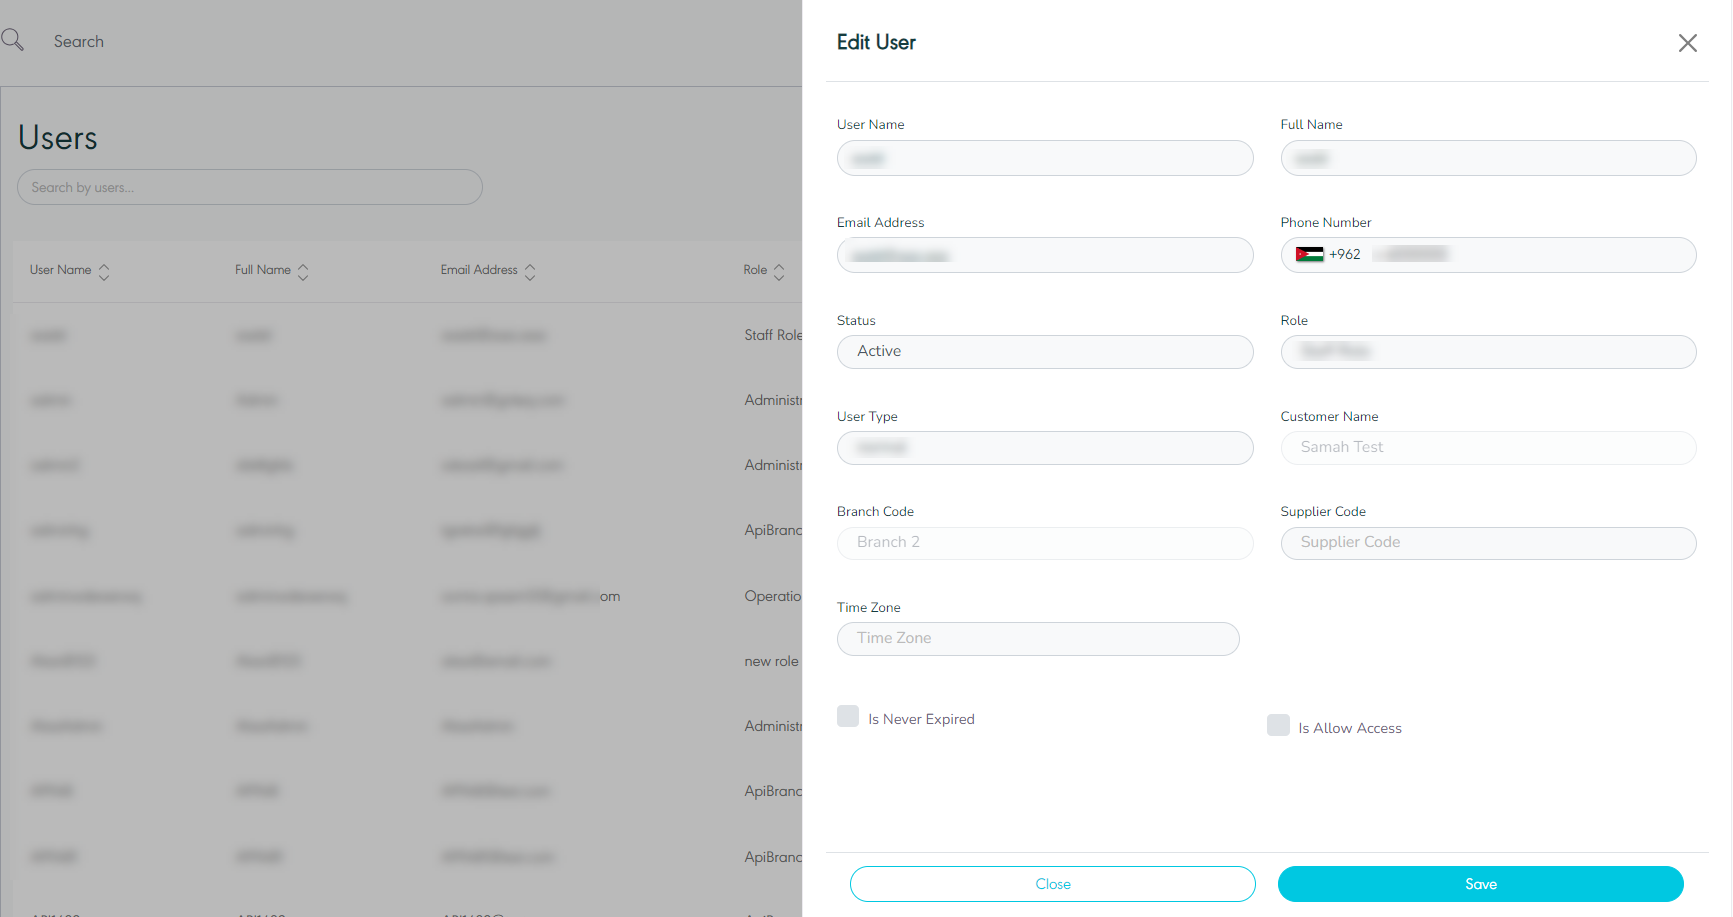
Figure 7- Edit User
By clicking on Save, the system updates the user successfully.
1.5 Delete User
The admin can delete an existing user by clicking on Delete from Actions by navigating to the ‘Users’ screen via the Accounts Module.
1.6 Reset Number of Login Retries
The user can ensure that the application does not allow an attacker to reset or lockout user’s accounts. - No application lockout mechanism implemented.
2. Roles
2.1 View Default Roles
This section represents the Administrator and API Branch default role that already exists on the system as follows:
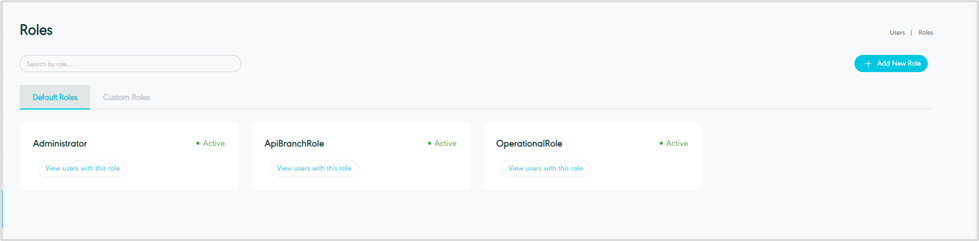
Figure 8- View Default Roles
View users with roles: the admin can display all permissions in this role.
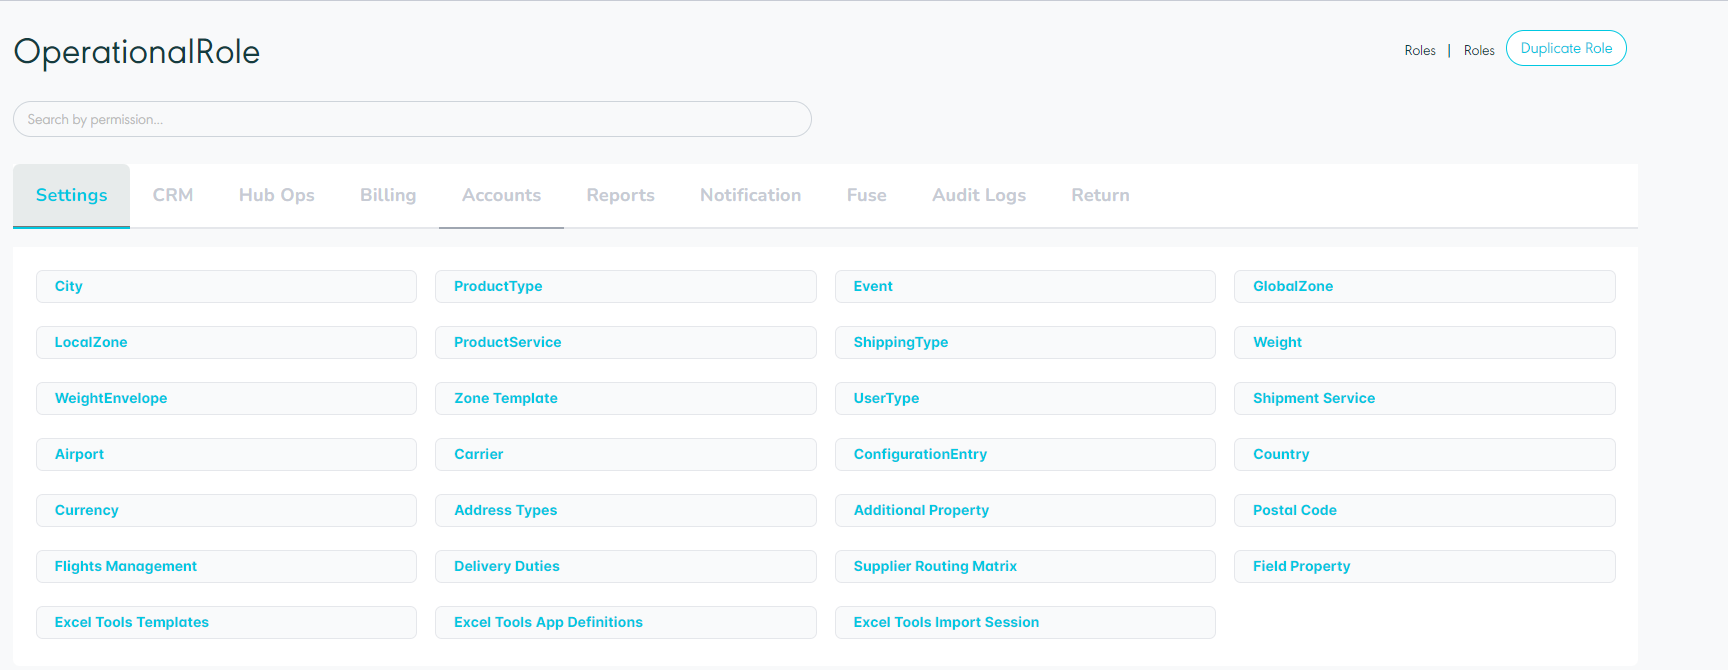
Figure 9- Permissions
Search: the admin can search for the permissions by typing the permission name in the search filter field.
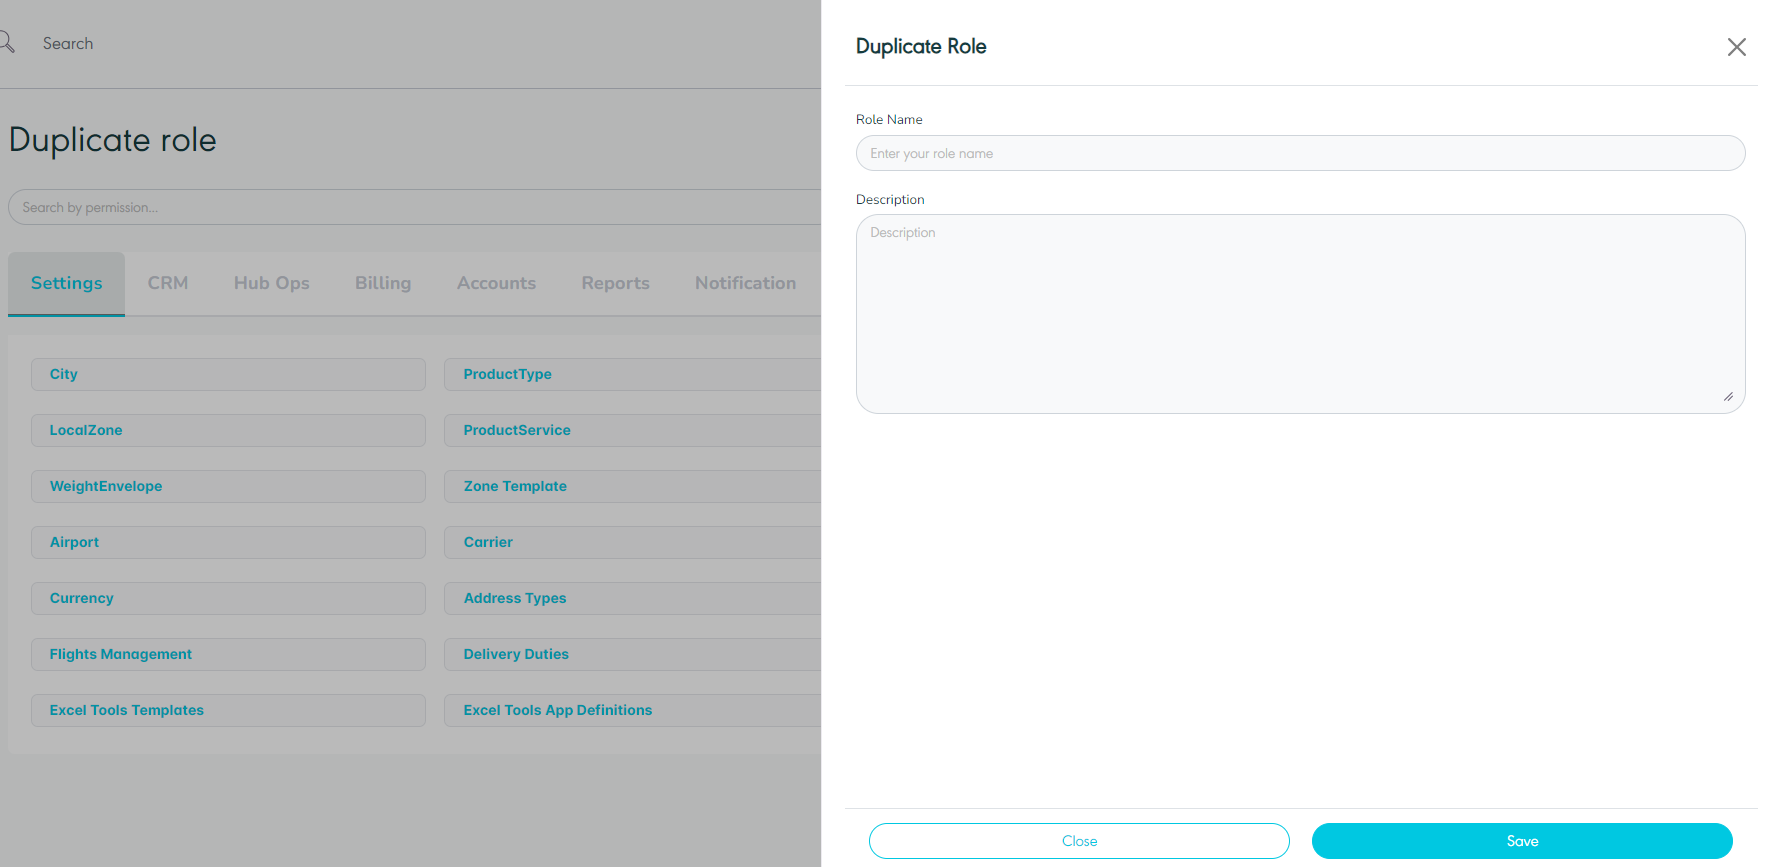
Figure 10- Duplicate Role
Duplicate Role: the user can copy the role where the system creates a custom role with the same permission as the original copied role.
2.2 View Customs Roles
This section represents the roles added by the authorized user who has permission to add roles on the system as follows:
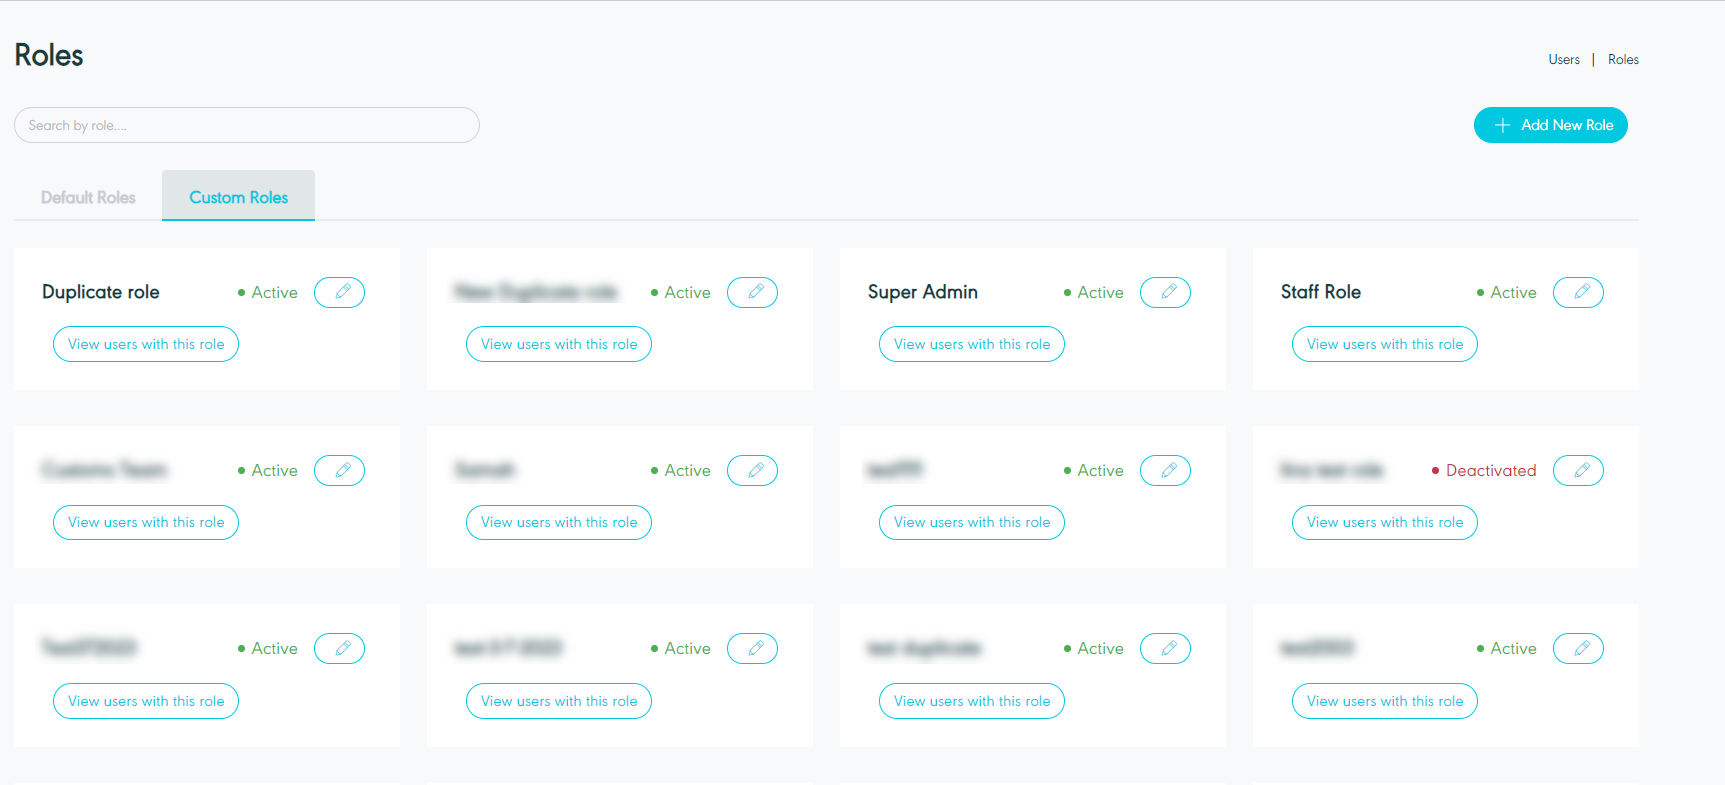
Figure 11- View Customs Role
2.3 Add New Role
The admin can add a new role by navigating to the ‘Roles’ screen via Accounts Module and clicking on Add New Role as follows:
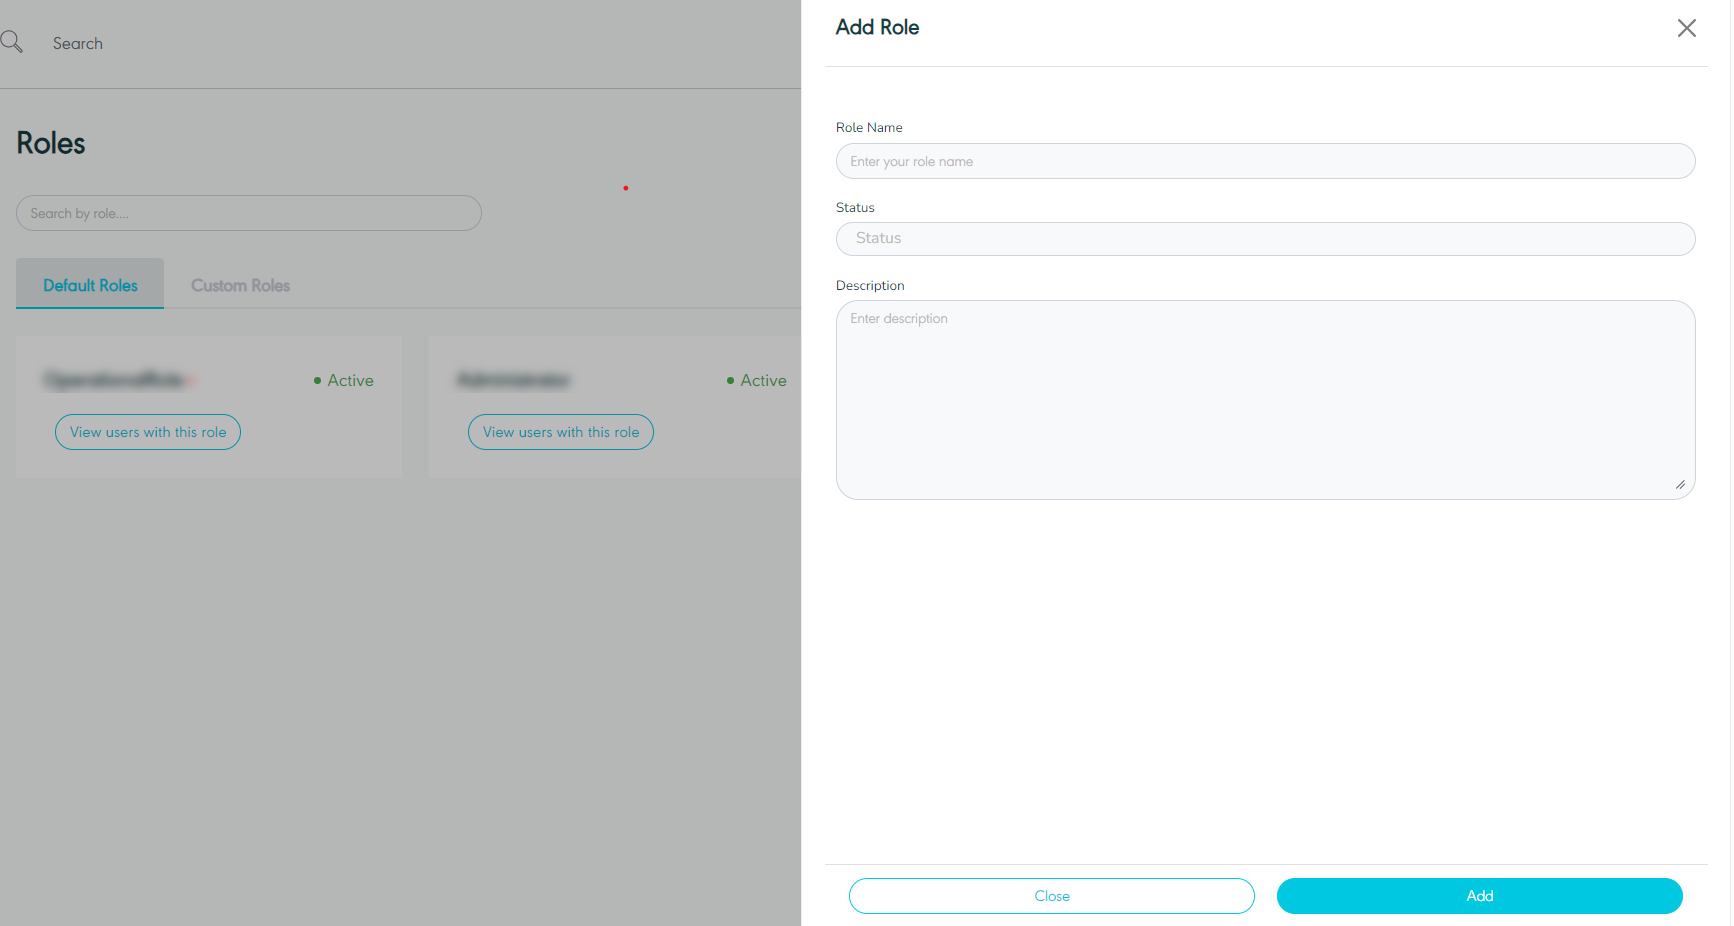
Figure 12- Add Role
Role Name: this field represents the user’s role name.
Status: this field represents the status where active means that the role is currently functioning with GN TEQ and inactive means that the role is no longer with GN TEQ.
Description: this field represents the user’s role description
By clicking on Save, the system adds a new role successfully.
3. Permissions
The admin can view list of permissions in the system by navigating to the ‘permissions’ screen by choosing the Accounts Module from the left navigation panel as follows:
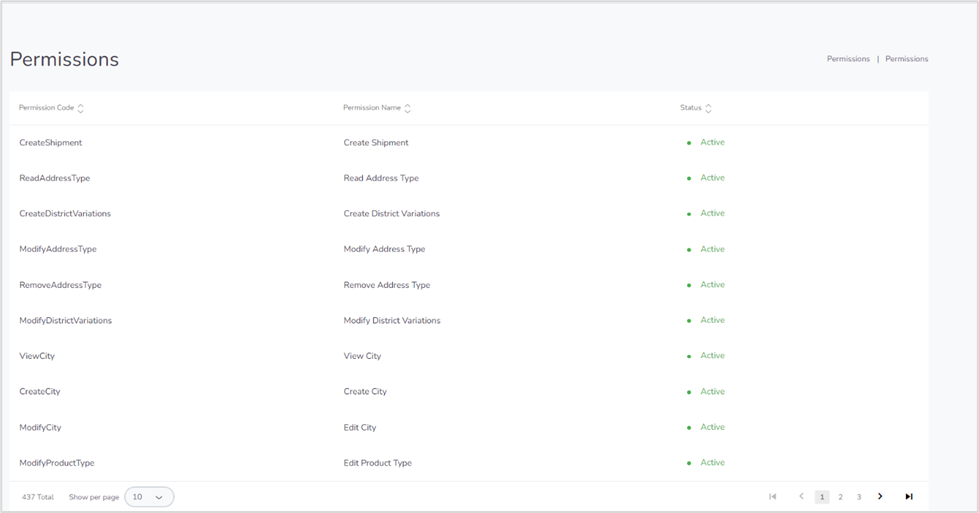
Figure 13- Permissions
Show per page: the admin can select the number of items to show on each page.